[singlepic id=21 w=320 h=240 float=center]
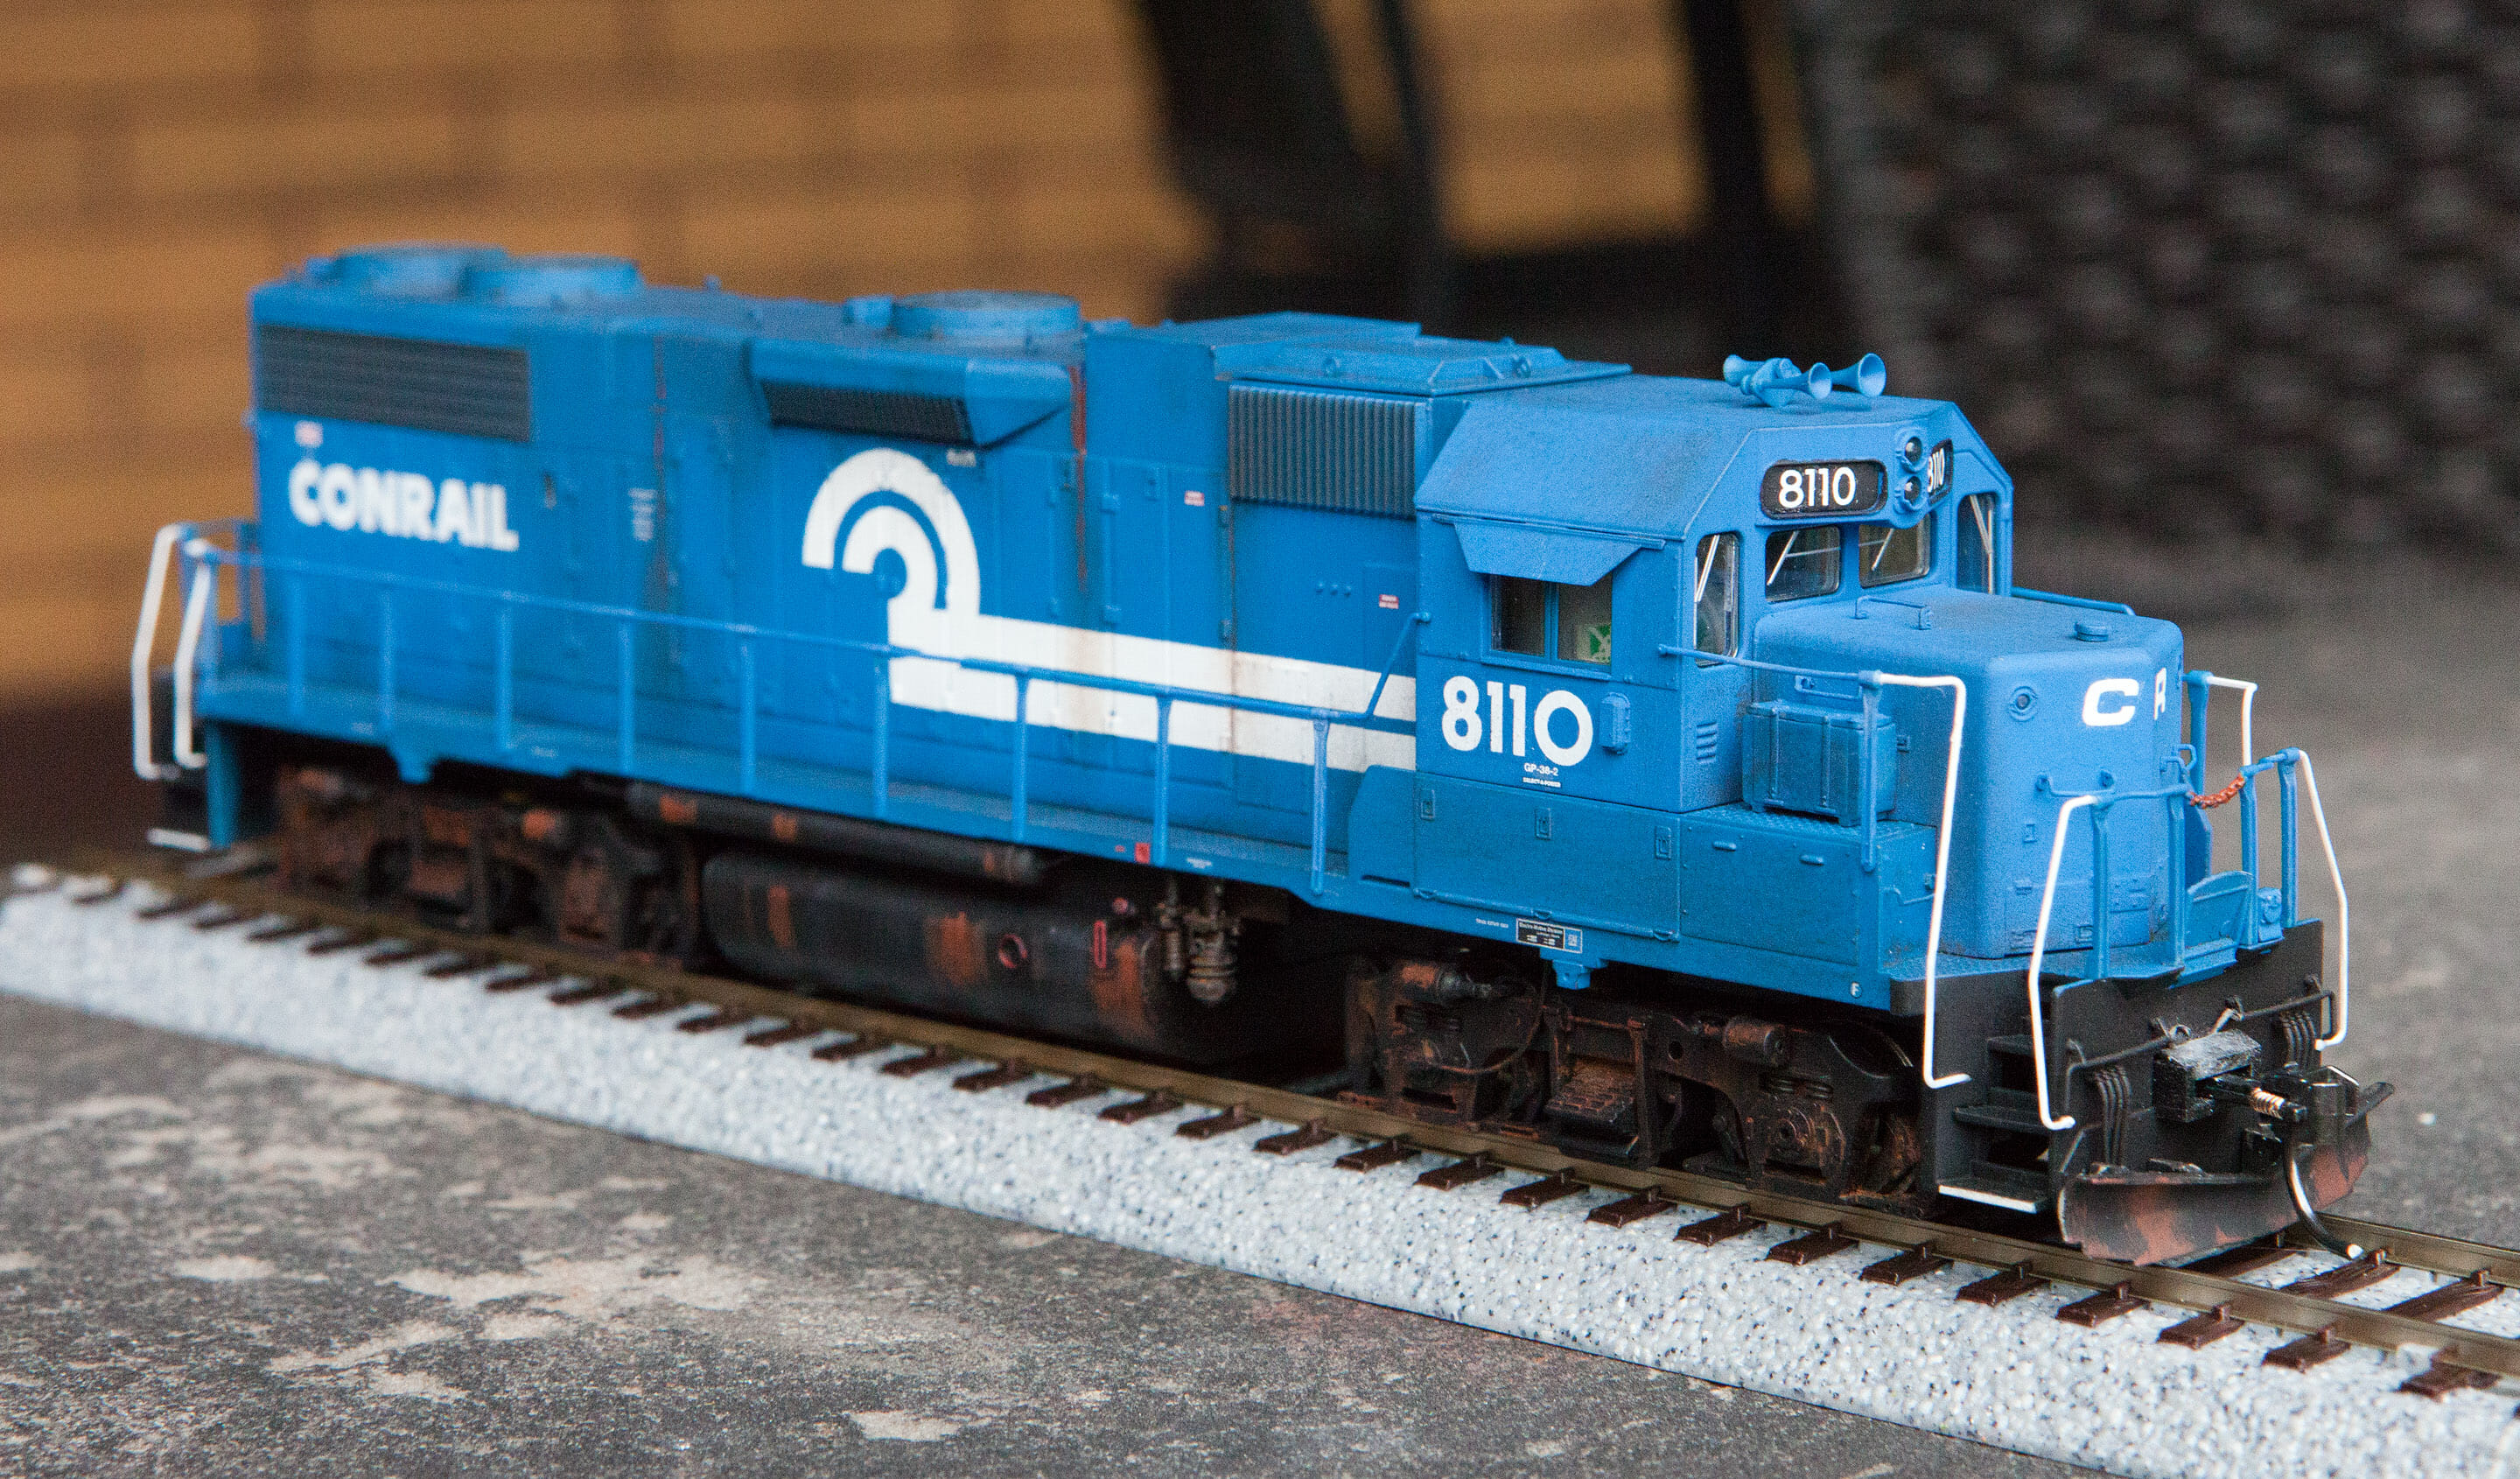
After the baby was born, I received the most awesome of gifts from a close friend of mine: a Life-Like Proto2000 GP38-2, painted as Conrail 7993. These engines are wonderfully detailed, out of the box, and they run really well. Well, I’m modeling the early-mid 1990s, and by then, this particular unit was returned to EMD where it served out the rest of its life as an EMD lease unit. Last year, when I started seriously considering re-entry into model railroading, another close friend suggested I model the CR 8110 – a fairly normal, worn out GP that was often seen in the Allentown area. It was noteworthy, though, for having Penn Central style nose lettering. Rather than CONRAIL spelled out on the nose, it has C R in italics. In addition, the engineer’s side featured unusual number placement to avoid overlapping a cab air filter, such that the number was not centered under the cab window.
Renumbering
The 7993 was nicely painted, and I didn’t want to re-do the entire thing. So I removed the cab & nose, and also removed the number boards and all of the headlights & window glass, to allow for weathering and Dullcote later. Next, I added detail parts: a Details Associates 2306 cab signal box, a Detail Associates 1906 cab air vent (engineers side); and a sunshade (engineers side only, based on prototype photos) and then airbrushed the cab/nose assembly with Floquil Conrail blue. I used Microscale decals for the numbering & number boards, and then reassembled the cab & nose to the rest of the body. I also decaled the number boards at this point (what a pain). Sometimes the decal film needs to overlap adjacent numbers in order to have the right letter spacing (kerning); therefore I’ve found it best to add the center two numbers first, let those set, and then add the outer two.
DCC
When I was disassembling this engine, I saw that the nose marker lights were actually lenses… which meant that I could add tiny red LED’s to replicate the way these lights would have been used in the 1990s. Occasionally they would be on, while the engine sits in the yard; other times, you’d see them illuminated on the last engine of a light engine move (a group of locomotives with no train). I used an NCE P2KSR decoder, which is a drop-in replacement for the PC board that is installed on the P2K GP38-2’s and other units (SD60, etc). In my testing, I promptly burned out the headlights – failing to note that the decoder puts out 14V on the function outputs and that the headlights are expecting 1.5V. Whoops! I’d planned to replace them with Miniatronics Warm White LED’s anyway…
The Proto2000 GP38-2 includes 4 lightbulbs, two on each end. One is the headlight, the 2nd is for the number board lights. I replaced each with Miniatronics Warm White LED’s in series with 1K ohm resistors. The wire I had on hand was too large to fit, so I bought a Digitrax 30AWG wire set (reasonably priced, comes with 9 colors at 10′ in length for about $15.) The 30AWG wire is fragile, though; I’d nicked it with the soldering iron in a couple spots. This bit me in the behind, later.
The marker lights were somewhat challenging. First, I had to disassemble the large metal weight, and I got out the hacksaw in order to cut the ends to make room for the marker lights. After lots of test fitting, I realized that the wire run had no room, so I disassembled again, this time drilling a channel for the rear marker light wires to go around the number board area. For the marker lights I used Miniatronics red mini-LEDs, four wired in series with a 1K resistor. After several tests, everything was great until I smelled the burning electrical smell… Not good! One of the 30AWG wires was nicked and must have shorted; this burned out the TTL circuit for the function output, meaning that the marker lights wouldn’t turn off. So, I had to replace the DCC decoder (!), and this time around I was quite careful to insulate and carefully route all of the wires before reattaching the shell to the chassis.
Detailing & Weathering
I painted all of the handrails & lift rings, so that they would not take on the eerie translucent appearance that the engineered plastic usually does (I hate that look). I should have pre-treated the handrails with paint prep spray, but I figured I’d take my chances. (The paint likes to peel off this type of plastic.)
I did some weathering before reassembling everything. My process is to use thinned black paint to grime up any of the fans, filters, and vents. This unit had some rust streaks, so I used a fine brush to brush some rust on, especially on the fuel tanks. I followed this with a lot of PanPastel weathering chalks. I like to use rust/brown along the bottom, grey/grime/black along the walkways (& slightly up the side of the unit), followed by lighter grey and rust on the roof and down the sides. I sprayed a few coats of Testors Dullcote to seal it all in.
Final Assembly
For final reassembly, I put all the window glass back in, added a Details West weed cutter plow, a Details West air filter set (to the fuel tank), and put the handrails back on. Then it was time to add the shell back to the trucks & chassis. The last thing I did here was to paint the bottoms of any of the light pipe (clear plastic) to avoid the marker lights contaminating the number board lights (and vice versa). I used lots of electrical tape, and some double-sided foam tape, to secure the DCC decoder and wiring in place, and reattached the shell.
Comments
The number board lights aren’t all that effective, partly because the repainted number boards are black with white decals overtop. It would have been quite difficult to have translucent numbers. The red marker lights look good, but the LED’s don’t line up perfectly with the lenses, in part due to the size of the LED’s (which is still, surprisingly, a bit large). But with the lights dim, the marker lights look great!
Parts List
- NCE P2KSR Decoder
- Miniatronics Yellow-glo 3mm LED (headlights)
- Miniatronics red 1.5mm LED (marker lights)
- RadioShack 1K ohm resistors (I used 1/2 watt. 1/4 would fit better.)
- Digitrax 180001 30AWG NMRA DCC wire
- Detail Associates 2306 cab signal box
- Detail Associates 1906 air vent flat
- Details West 150 Weed Cutter Plow
- Details West 139 air filter set
