
It has been awhile since I’ve updated everyone… First, about the layout. The Aspinwall Belt was dismantled and put into storage in March, 2016 in preparation for waterproofing and finishing the basement. So far, that hasn’t happened yet. But, I was smart enough to leave my modeling work area intact, and so I’ve been using the time since then to continue working on weathering and detailing locomotives and rolling stock. With that in mind, I’ve (finally) completed a project that’s been on the shelf for over three years!

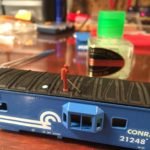
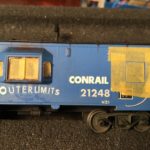
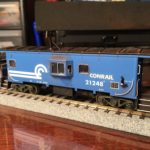
Back when I first considered re-entering HO Scale, with the obvious choice of modeling the Allentown & Bethlehem (PA) area in the mid-1990s, Lou Capwell immediately suggested that I needed to model the Outer Limits caboose. The “Outer Limits” caboose, Conrail 21248, was one of 113 N-21 class cabeese build in about 1984, by FGE at Alexandria, Va. These were the only cabooses bought new by Conrail, numbered 21201-21313. (CRHS) An employee stenciled the phrase “OUTER LIMITS” on one side of the caboose, which adds to its distinctive appearance.
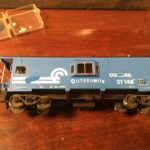
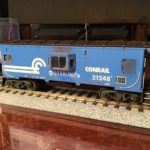
I had a Walthers “International” caboose in CR paint, that seemed a close match, and so about 3 years ago I set it aside and started to work on it. My attention to detail and weathering skills have improved since then, which helps me feel less bad about not finishing this project sooner. I started out by disassembling the caboose, removing the windows, etc. I had to blank out a couple of windows, putty and sanding (blech) them smooth. I didn’t get too particular about replicating every detail of an N-21 caboose, but I wanted to give the impression of the N-21. For example, I relocated some of the brake appliances to approximate their locations as observed in prototype photos. I also fabricated an equipment/battery box on the stove-pipe side of the car, using strip styrene.
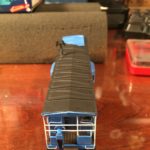
I found it easier to paint and weather the underframe of the car as a separate item from the caboose body itself. Ultimately, I repainted the caboose using Scalecoat II Conrail Blue spray can, and added decals from a variety of decal sets (Herald King, Champ, and of course Microscale) to get as close as I could to the prototype. After paint and basic decals, I set out to do more detailing: The stove pipe is a Bowser detail part from an N8 caboose, with a bit of brass wire added as a support. On this model, the end sills/ladder assemblies inset into the caboose ends on the body, leaving visible seams. I use a neat product called Mr. Dissolved Putty which is just what it sounds like – drop it in and it wicks into the cracks. It may take a couple of applications to get it right, but overall it was pretty effective at making the top/end area ready for marker lights and the reporting marks/number. Cal-Scale marker lights were used – I approximated by using two different types to match the abused marker lights from the mid-1990s photos I could find online.

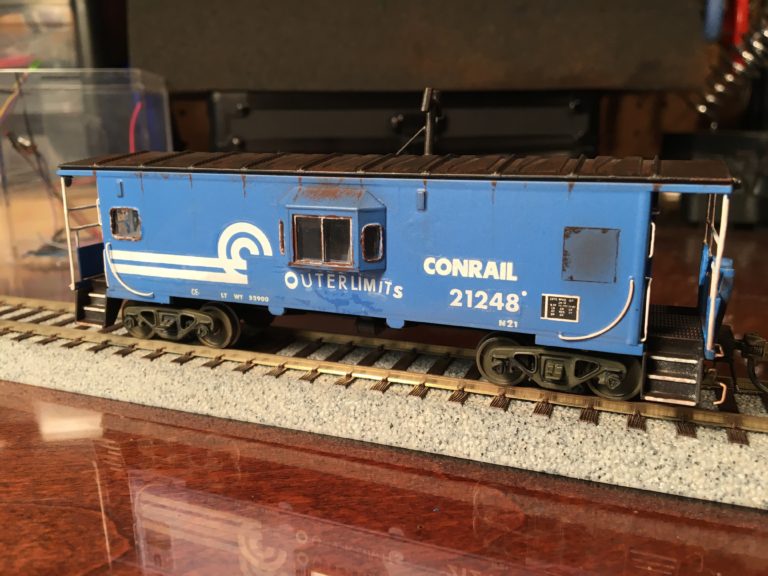
Other finishing details included an equipment shelf on the end walls, little bits of styrene along the frame to more closely match the N21; and I made a fuel vent and fill with a bit of styrene, the threaded end of a tiny screw, brass wire, and bits of insulation. Finally, I added brake wheel chains, air hoses, and fashioned my own uncoupling rods out of brass wire.
For the graffiti and weathering – I used a variety of decals to get the OUTER LIMITS lettering to look somewhat correct. I modified some of the letters to get closer to the correct font. A combination of diluted acrylic rust brown and rust PanPastels were used for the roof and ends. I drybrushed white paint, and added white PanPastel to represent the overspray from the OUTER LIMITS stencils (look closely!). I masked and painted the “patched out window” using acrylics and rust PanPastel powder. A little grimy gray powders, rust Acrylic drips, and lots of Testors Dullcote to finish it off.
Overall, I’m pretty happy with the look and feel of this car – it will be right at home with my CR GP38-2 fleet, SW1500 switcher, and GP15-1 which will all rotate in assignments to the East Penn Drill on my planned new layout.